Wednesday, January 20, 2010

AIR COMPRESSORS FOR AIR SANDERS


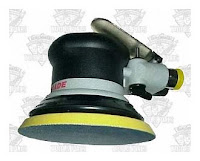
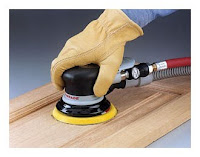
          My experience in manufacturing fine hardwood furniture has taught me that about half the time involved in producing each chair, table or cabinet is taken up with sanding. When you are trying to make a living in the woodworking business with hourly employees you must cut wasted time to an absolute minimum. This does not mean becoming a slave driver but, rather, removing any and all obstacles that may be slowing down construction, sanding and finishing. I started out my woodworking career with a ¼-sheet electric sander, quickly graduated to a random orbit electric disc sander and finally realized that I could substantially shorten sanding time with an air palm sander. I settled on a 5” Dynabrade sander and Sears 3HP air compressor. It took me less than an hour to realize my mistake: the little compressor I bought could not begin to keep up air demands of the air sander. It would run out of air pressure almost immediately and the air sander would slow down to the point of being useless. I would then have to wait for several minutes for the pressure to build up again to get another minute of sanding.

          To make matters worse, I had three employees hired as sanders and so I would need to keep three machines running at top speed all day long. I did some math and discovered that I would need a ten horsepower compressor with a large tank to do this. I was lucky to find a used one for not too much money but it required three phase power and lots of it. More money went out for an electrician to wire it up to the building’s 208 volt 3-phase power. The compressor was so loud it could be heard all over the building and down the block but it powered those three sanders from dawn to dusk. The good news is that it paid for itself in saved sanding time very quickly.


          Air sanders are aggressive and efficient. They are light in weight when compared to their lesser electric cousins. My sanders took to them immediately and production took off. I was as happy as they were. Soon there was another machine requiring large amounts of air in the shop: an Onsrud inverted pin router. Plus, it was great to be able to blow sawdust off benches and machines while cleaning upon the shop at the end of the day.

          Years later, I built a smaller woodworking shop in my home which only required one sander running at a time. For that shop, I purchased a compressor half the size and isolated in a soundproof room in one corner of the shop. I ran ¾” galvanized pipe under the shop floor to three regulators at three different convenient locations. The machine I purchased for that shop was a 5 HP Ingersoll Rand model with an 80 gallon tank. At the 80 PSI required by my Dynabrade sander, the compressor would produce enough air all day long. I must say that that compressor was very well built. All I had to do was keep an eye on the oil level in the sight glass. At night, I would turn off the master air valve on the side of the machine, leaving the electricity on, to silence the compressor for the night.

          I must assume that, having read this far, you have some interest in using an air compressor to power air tools in your shop. There are a few things to consider carefully in selecting the right compressor for your particular needs. As a rule of thumb, a 5 HP air compressor will power one air sander, a 7.5 HP machine will power two and a 10 HP machine will be needed for three sanders.

           The size of the tank is an important consideration: the smaller the tank, the more often the compressor will need to cycle on and off and too much of this is hard on the motor and compressor pump over time. I would not even consider an air compressor used to power an air sander with less than a 60 gallon tank and I would feel much more comfortable with an 80 gallon tank.


          The type of electrical power required is another consideration. If you have three phase power available at your location, fine. Three phase motors tend to use electricity a bit more efficiently than single phase motors. Large air compressors will all require 3 phase power but the 5 HP models come either way. If you do not have 3 phase power available, you can manufacture it with a rotary or electronic phase converter as I did in my smaller shop. Whether you use single or three phase power, you will need 230V AC power for single phase motors and 208 to 230V AC for the three phase variety. Three phase motors are not as picky about exact voltage as are single-phase models. Be sure to check the voltage and amperage requirements of any air compressor before you buy it. Electricians can be expensive if you don't have the right kind of power already available.

          Two-stage compression is a must for a machines of this size. Two-stage machines have two cylinders, one larger than the other. Air is first introduced into the large cylinder where it is partially compressed and sent to the smaller cylinder for final compression into the tank. As air is compressed, heat is produced and so a good machine will always have a finned intercooler built in.

          Compression not only produces heat but squeezes water out of the air which ends up in the tank. Tanks can rust internally over time and if this is not kept in check, the air tank an eventually explode causing tremendous damage and even death. That is why it is critically important to drain the accumulated tank water every day. Most machines come equipped with a drain valve at the lowest point of the tank. If you don’t want to spray water all over the floor under the compressor, you may want to consider piping it from the valve to another location such as under the floor or into a drain. Piped water will flow uphill into a sink because it is being pushed out of the tank by compressed air. Fancier models may include an automatic tank drain.

          You will need at least one regulator and a water trap in line before it. These are not expensive. A regulator allows you to set the correct air pressure for the tool you will be using (say, 80 PSI) instead of tank pressure (say, 175 PSI).

          Air output of a compressor pump is expressed in standard cubic feet per minute (SCFM) or just cubic feet per minute (CFM). Not all 5 HP compressors put out the same volume of air per minute. This is a function not only of motor horsepower but also the efficiency of the compressor pump the motor is powering. The higher the CFM, the less your compressor will have to cycle on and off to keep up with the demands you are putting on it. A small compressor pump on a huge tank will produce no more air than on a small tank. The only difference will be in the number of times the compressor cycles on an off each hour and the time it takes to recompress the tank on each cycle. In the end, you need to pay attention to SCFM (or CFM) more than you do motor horsepower or tank size. Air is the end product of any compressor and the CFM must be sufficient to the job at hand.

          All reciprocating air compressors throw out oil with the air they compress. When the tank reaches it’s designed maximum pounds per square inch, a pressure switch will interrupt electrical power to the motor. Simultaneously, a certain amount of oily air will be released into the shop environment. You may see oil collecting on the wall behind the compressor and on the pump and compressor pump over time. This is not cause for alarm but periodic cleaning may be needed.

          Reciprocating (piston type) air compressors make noise and this is something you need to plan on for the sake of yourself, your workers and others who surround your location. If quiet is an important criteria, you may want to consider spending the extra money for a screw-type air compressor. Screw-type compressors have no pistons or cylinders. Air is compressed in turbine fashion by a large metal screw, turning at a very high speed. These compressors just purr compared to the reciprocating type but they are very expensive. They sound more like a quiet jet engine than a loud truck motor.

          If you are in the market for an air compressor to power your air sanders and other air tools, be sure to check out our reviews of stationary reciprocating compressors from 5 to 10 HP at http://perfectwoodworking.com/aircompressorsreview/. We look at a variety of machines in various sizes from Campbell Hausfeld, Ingersoll Rand, Porter Cable and Quincy.

Bob Gillespie
Woodworker

© 2010 PerfectWoodworking.com

For similar woodworking articles and tool reviews see:

http://www.PerfectWoodworking.com/


Friday, January 15, 2010

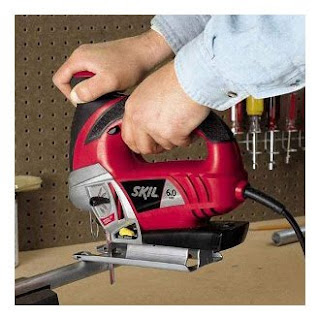
JIGSAW REVIEWS


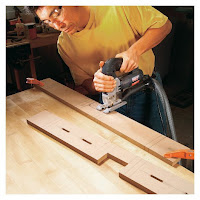
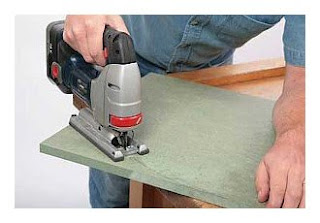
          I’ve been using jigsaws longer than I’d like to admit. I found the first one lying around my dad’s woodworking shop in the basement of my childhood home. A few years after that, I purchased a cheap one from Sears. That jigsaw gave me the quick usefulness that all jigsaws provide but there were persistent and annoying problems without apparent solutions: First, The blades had no guides so they would always wander away from the cut line, especially when I was trying to track curved pencil lines. Second, when cutting curves in thick material, the blade would bend toward the outside of curves. Third, early jigsaws did not have orbital pendulum action and so they would load up and burn in thick materials. Changing blades required a screwdriver and you had to be careful not to lose the set screw.

          Today’s top-quality jigsaws have eliminated all of those problems and are, by comparison to the earlier models, revolutionary. I will confine my remarks to better quality machines because there are still bargain basement models out there with the problems I just outlined. Having said that, here are the important things that you should be looking for in your next jigsaw.
         
          At the top of my list are the subjects of blade tracking and blade guides. Take a close look at how each manufacturer has approached these challenges because you are probably not going to get a chance to try out your next jigsaw before buying it. Look for specifics: Some manufacturers simply say something like “superior blade tracking” without saying how this is accomplished. Others are convincingly descriptive.

          Another issue with all jigsaws is wood splintering. Most, but not all, jigsaw blades are designed to cut on the upward stroke which means that the splintering often occurs on the good side of the board or plywood. Splintering can be minimized in two ways: fine-cut blades and anti-splinter inserts mounted in the saw foot immediately adjacent to each side of the blade. Fine-cut blades cut slowly and so if speed is a requirement and you are using a more aggressively-toothed blade a splinter insert is an absolute necessity unless you plan to sand and/or rout away the splintered area later.

          Frequent blade changes are a fact of life with all jigsaws. In the interest of production efficiency, this process should be as fast and easy as possible. Gone are the days of screwdrivers, Allen wrenches and set screws. You want a saw that lets you pop blades in and out in rapid fashion.

          If you are health conscious and want to minimize airborne dust in your work area, you may want to collect dust right at its source by connecting a vacuum hose to the saw. In that case, check for a dust port and make sure that it is compatible with your vacuum hose. Personally, I prefer to wear a good dust mask and thus avoid the inconvenience of dragging a vacuum hose along with the machine when I am trying to control the machine along curves.


          I mentioned orbital pendulum action above and I would not even consider buying a machine without it. My first orbital machine was a Bosch barrel grip model. I was allowed to try one out in a woodworking store while I was on a business trip and it went home to Hawaii in my suitcase. Here’s why: The salesman had a piece of eight-quarter White Oak and encouraged me to cut some curves in it. There were four orbital settings on that machine with the first being “no orbital action” and each one after that being more aggressive than the one before. With the orbit in the “off” position, I began a cut. As I expected, the machine slowly labored through the cut and I knew that if I pushed it any harder, the blade would either burn or break. Then, at the suggestion of the salesman, I put the orbit lever in position “4,” the most aggressive, and made another cut. The blade flew through the thick Oak as if it were butter. There is a bit more splintering than before but not really that much. Sold, American!

          A side benefit of an oscillating jigsaw is extended blade life. When a blade is stuck inside a cut, it has nowhere to dissipate the heat. The pendulum action oscillates the blade in and out of the cutting face, letting cool air in while the blade is away from the cut. At the same time, the accumulated sawdust is allowed to drop out of the cut so the blade is always cutting new wood, not old sawdust. That’s why it can go faster and cooler.

          Most good machines, but not all, have Electronic Speed Control (ESC) which is an important nicety. ESC is like the cruise control on your car: It maintains a constant speed with changing load conditions. The harder you push the jigsaw, the more electrical power is delivered automatically to the motor so that the saw blade will not slow down. The analogy is your car on cruise control going up a hill.

          Many jigsaws today are available in two different body styles: barrel grip and top-handle (sometimes called D-handle). I have owned both and I have a personal preference for the barrel grip style because it is easier to control when making fine cuts. Just like when using a router or any hand power tool, a low center of gravity and a solid grip equate to better control. With a top-handle machine, your hand is at the top of a taller machine and the tendency to tip over is greater. With a barrel grip jigsaw the center of gravity is as low as it can be. There is a knob on top, right over the blade, for your other hand for better control. The big, round barrel is easier to hang onto than the thinner D-Handle.

          Jigsaw manufacturers usually measure motor power in terms of amperage, rather than horsepower. This is fine because amperage is a more reliable indicator of actual power than horsepower. The more amperage, the more power and power is important when cutting thick or dense materials.

          The speed of the jigsaw blade is expressed in “strokes per minute” or “SPM.” The more, the better.

          Cutting depth is something you will want to consider when dealing with very thick or dense materials. In soft wood, cutting depth refers to the maximum distance between the bottom tooth on the blade and the foot plate of the jigsaw when the blade is fully extended. In metal, plastic or other materials, cutting depth is based on the ability of the saw and blade to cut through dense or resistant materials.

          Jigsaws are often used to cut expensive and delicate materials such as veneered plywood panels and a standard, steel foot plate may leave scratches as it travels along behind the blade. Some manufacturers offer coated foot plates, some provide an “overshoe” for the foot plate and some completely fail to address this issue. If you cut delicate materials that can be easily marred, pay careful attention to this feature (or lack of it.)

          Machine weight is the next consideration. My knee-jerk reaction is to look for the lightest machine so that I won’t tire so easily during a long day of cutting. On second thought, the light weight is nowhere near the advantage as it would be in, say, an impact driver or electric drill because the jigsaw’s weight is almost always resting on the material being cut. Further, light weight could mean that the manufacturer skimped on construction materials, possibly substituting plastic parts for metal as a cost savings.

          Stroke length is the distance the saw teeth travel up and down while cutting. This is almost universally one-inch and so it is not a useful number when comparing models from different makers. Generally speaking, the longer the stroke, the faster the cut and the shorter the stroke, the smoother the cut.

          Jigsaws can make bevel cuts, usually up to 45 degrees from vertical, both left and right. The more bevel, the thinner the material that can be cut. Adjusting the bevel can be hard or easy. Some jigsaws require you to use a screwdriver, hex wrench or Allen wrench to loosen or tighten a set screw that holds the foot in a particular position. Other jigsaws are designed with the adjusting mechanism built-in and, thus, requiring no tools. Opt for the latter when possible, everything else considered.


          All jigsaws vibrate and make noise. Obviously the less vibration and noise the better. Vibration is transmitted to the point of cutting and affects your ability to control the cut. More importantly, vibration is tiring when it goes into the operator’s hand and arm. Various manufacturers have approached this problem in different ways but the most common anti-vibration technique is to “counterbalance” the motor. The other way is to put vibration-absorbing material on the outside surfaces of the machine that come into direct contact with the hand(s) of the operator. Padding will not, of course, minimize the vibration transmitted to the blade at the point of cutting. Noise reduction varies by machine design and the only way to make this comparison requires running the jigsaws you are considering for purchase.

          Some jigsaws come equipped with a variable speed wheel to set the maximum speed of the tool for better cutting results in different materials. This is different than the speed control of the variable speed trigger. Full speed on the trigger will always be limited by the setting of the variable speed wheel. Most triggers have a lock-on feature because holding the trigger on all day long can actually make your hand go numb. Barrel grip jigsaws do not have a trigger but use a lock-on type thumb switch instead. If you have the variable speed set at half-speed and you lock the trigger or thumb switch, you will get half-speed at full trigger deflection until you change the setting on the wheel.


          Most jigsaws come equipped with some sort of air blower to keep chips away from the cut line. The air blower on the earlier machines was located half-way between the operator’s chin and nose. Some manufacturers mount the blower nozzle near the point of cutting, others on the top of the machine. Some have adjustable nozzles. The important thing is effective chip and dust removal so you can see where you are supposed to cut.

          Another aid to clear vision of the cut line is a built-in light. LED lights are best because they are bright white and last virtually forever. Just in case they don’t, see if they are replaceable and available.


          There are several blade types available and you will have to use the one that your jigsaw is designed to accept. There is a difference in blade types. The T-shank is my preference because it stays locked in the saw plunger. Other types include tang shank and U-shank. Once you know what type of blades your jigsaw requires, be sure to check for the availability of blade types and designs appropriate to the work you will be doing. Rough cut blades power through thick and coarse materials but leave a lot of splinters. These blades usually less and bigger teeth.

          Fine cut blades have many more teeth, leave fewer and smaller splinters but cut slower and are generally shorter in length. They also may be thinner (front to back) to allow for tighter turns around sharp curves. They will break more easily than a coarse blade. Metal cutting blades are also available. Use these only for metal because they will not cut wood very easily and they will load up and burn in wood. On the other hand, a wood-cutting blade will not be able to cut metal effectively. Depending on the manufacturer, there are many other specialized types of blades available. Make sure you always have plenty of extra blades available to avoid unexpected trips to the store right in the middle of a job.

          If you'd like to see how a selection of top-quality jigsaws from Bosch, Dewalt, Festool, Hitachi, Makita Tools, Milwaukee and Porter-Cable stack up in light of what has been said above, check out "Jigsaw Reviews" at http://www.perfectwoodworking.com/jigsawreviews/.


Bob Gillespie
Woodworker

© 2010 PerfectWoodworking.com

For similar woodworking articles and tool reviews see:

http//www.perfectwoodworking.com/


Monday, January 11, 2010

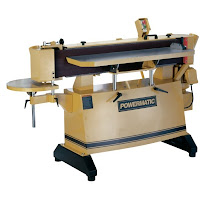
THE EDGE SANDER IS A VERY USEFUL MACHINE

          Over the years, I’ve told many people that, next to the table saw, my edge sander has been the most utilized of all the woodworking tools in my shop. That may be because my woodworking designs always seem to have a lot of curved surfaces incorporated into them. While it is true that an edge sander can sand long, straight edges, I use it to sand inside and outside curves far more often than straight edges.

          With an edge sander, I can even sand large, round table tops using a jig with a pivot pin in the center. (See my woodworking article on that subject at PerfectWoodworking.com/edgesanderjigarticle.) My machine uses 6” x 108” sanding belts and has about a three-foot platen surface. Outside curves are sanded on the front table and inside curves on the end table using the curvature of the idler drum. My edge sander does not oscillate and neither the front table nor the platen can be tilted. Most machines being sold today are less limited than that.

          My technique is to mark the final profile to be sanded with a pencil line on the workpiece and then cut just outside of that line by about one blade width with the band saw or a jig saw. If the work piece is too large to manage on the band saw, I use the jig saw (sabre saw) to make the cut. After that, I use the edge sander to bring the work piece down to its final dimensions.

           An oscillating edge sander keeps the sanding belts from loading up and burning by constantly moving the sanding belt up and down with reference to the work piece. An edge sander with a tilting front table or a tilting sanding head allows you to sand bevels and even compound angles.

           If you’ve used edge sanders much, you know that, at a certain point, the sanding belt is going to go, announcing its departure from this world with some scary rumblings followed by a loud bang. I have never been hurt by this but I have always jumped away from the machine at the first sign of trouble.

          One good way to keep this from happening is to make sure that your sanding belts are no more than 6 months old because the glue that holds the lap or butt joint together tends to dry out and weaken with time. When ordering sanding belts, keep this in mind. Ordering sanding belts in large quantities may not a bargain in the end if you are ordering more sanding belts than you can use up in 6 months. Butt jointed sanding belts will leave a smoother finish but lap joints are much stronger and less likely to come apart.

          Another explosion-avoidance technique is to, whenever possible, avoid sanding sharp, pointed edges that can tear into the sanding belt and rip it up. If your machine has a coating on the platen, such as graphite, that will help reduce the friction between the back of the belt and the platen which will reduce heat buildup that shortens the life of your sanding belts.

          Dust collection on any edge sander is an absolute must and the dust collector must be large enough to handle any amount of sanding dust that might be created by your edge sander. If you don’t already own a dust collector that can suck up at least 600 cubic feet of air per minute (or more) you will have to add the cost of that machine onto the cost of the edge sander. So, when considering the cost of an edge sander, make sure you are looking at the total cost, not just the cost of the edge sander itself.

          To assist you in selecting the best edge sander for your personal or business use, take a look at our review of four machines from Delta, Jet and Powermatic at PerfectWoodworking.com/edgesanderreviews2/.
We examine several types of machines in a wide price range.


Bob Gillespie
Woodworker

© 2010

For similar articles and tool reviews, see:
PerfectWoodworking.com


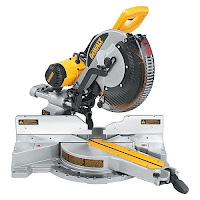
CHOOSING A SLIDING COMPOUND MITER SAW


          The sliding compound miter saw tops the list of woodworking tools that can make accurate and smooth angled cuts used in everything from fine cabinet work to house building. It's lesser cousins include cut-off saws, so-called "chop saws" and any miter saw without the slide.

          Do you need a 12" miter saw or will a 10" miter saw do? The pros of choosing a 12” miter saw over a 10” miter saw are greater cutting height and depth and usually more power. The advantage of a 10” miter saw is lower weight and lower cost. If a 10” miter saw will make all the cuts you can envision making in your shop or on the jobsite, by all means choose the smaller miter saw. The design and quality will be similar or identical within any particular brand.

          Obviously features such as maximum height of cut, maximum depth of cut, horsepower and weight will be different and you can see those differences clearly when sever machines are compared side-by-side.

          The obvious advantage of a sliding compound miter saw over a standard miter saw without a slide is that you can crosscut wider lumber in a single pass. With or without the slide, a miter saw can make chop cuts. A chop cut will always give you a finer, smoother result but on wider lumber, you may need to push-through as well and that is what the miter saw slide makes possible.

          There are many things to look for in shopping for the best miter saw and which miter saw you pick will depend largely on what you plan to do with the miter saw. If you are looking for a permanently bench-mounted miter saw in a woodworking shop, you don’t need to concern yourself so much with size and weight. However, if you are planning to tote your miter saw to and from and around various job sites every day, size and weight will become very important as will a well-located carrying handle.

          Most miter saws (with  one, notable eception)  are priced in the same neighborhood and so, if you are comparing models, price should not be a consideration. Concentrate on the features that are most important to you because, in this way, there can be significant differences between machines.

          So, what are you going to be using your miter saw for? If you are just going to be making repetitive crosscuts into 2 x 4 lumber, just about any of these machines will suffice. You might, however, want to choose one with soft start and an electronic brake. If, on the other hand, you will be making critically accurate cuts into expensive hardwoods or crown molding, it would seem that accuracy, micro fine adjustment controls with digital LCD readout, large vertical height capacity and an excellent laser might top your list of requirements. Is the laser adjustable to left or right of the blade? One miter saw even features dual lasers, one down each side of the blade, clearly and accurately marking out the kerf the blade will make before the cut is made.

          Other important considerations relate to bevel and miter adjustments. Look at how far, left and right, these adjustments can be made. Sometimes, 45 degrees just is not enough of an angle. Look how easily and accurately these adjustments can be made on each of these woodworking tools. Does the miter saw allow for micro fine adjustments? How many pre-set detents are there in both the miter and bevel scales? Can you make a cut near, but not exactly on a detent? Is there a miter detent override? Where are the controls and how do they work? Is everything within easy reach and easy to operate?

           What kind of blade comes with the saw and what size is the arbor hole? If the answer is something other than 5/8” or 1”, you may be locked into buying your blades from the saw manufacturer and you may well find better blades elsewhere. Usually, when I purchase a miter saw, I discard the blade and replace it with one that will make the smoothest, most accurate cuts possible like the Forrest Chopmaster. The extra expense is absolutely worth it if you are making critically accurate joints in fine hardwoods or crown molding. If you are only making rough cuts into fir for framing, you might want to consider a blade with fewer teeth and a more aggressive cut.

          How is dust collection accomplished with each saw? Does the port match the hose on your shop vacuum or will you have to depend on a dust bag? Will you have to buy a new vacuum that fits your miter saw? How much percentage of total dust made by your miter saw will your vacuum system and dust port remove?

          Is the motor on the miter saw you are considering direct or belt drive? Does this miter saw have soft start, electronic speed control or variable speed? Is the miter saw motor large enough for the jobs that will be presented to it? How large is the miter saw table (for stability of large work pieces)? How much does the miter saw weigh (for portability)? How is the cord stored when the miter saw is being carried to the jobsite?

          Your head may be spinning with all these considerations but you can get your questions answered and find the best machine for you in our review of 12" and 10" sliding compound miter saws at PerfectWoodworking.com/mitersawsreview/. We compare and contrast saws from Bosch, DeWalt, Festool, Hitachi, Jet, and Makita and we even give you a side-by-side comparison chart of all the features of these amazing machines.

Bob Gillespie
Woodworker

© 2010

For similar articles and tool reviews, see:
PerfectWoodworking.com


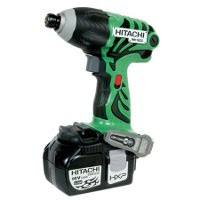
THE POWER OF IMPACT DRIVERS


          When they first came out years ago, impact drivers were very popular in Japan but it took a while for Americans to realize what a terrific advantage impact drivers have over an electric drill when it comes to driving long screws into wood, especially decking. American companies like Porter Cable caught on to the idea and started competing with impact drivers offered by overseas companies. The idea for impact drivers was born long ago with the inventions of (1) the impact wrench, used in every automotive garage, and (2) the hammer drill used to power masonry bits into concrete and other extremely hard materials.

          The technology that allows them to do this is sometimes referred to as “hammer and anvil” meaning that, unlike the simple twisting action of an electric drill, the impact driver literally “pounds” the screwdriver bit around as if being repeatedly being hit by a hammer. This action gives these woodworking tools tremendous power that simply would not be possible if the same screwdriver bit were chucked up in an electric drill with the same size motor and battery. An additional advantage is that there are hex shank drill bits available so that your impact driver can double as a quick-change cordless drill thus becoming one of your most versatile woodworking tools.

          The first time I picked up an impact driver, a 12-volt Makita, I thought it looked, to me, like a toy. I then tried it out by driving a 3-inch deck screw into a 4” x 4” piece of fir. I was amazed as I watched (and felt) the tiny machine effortlessly drive the screw home, sinking the head below the surface of the wood. I had to remember to keep a lot of hand pressure against the tool so that the screw driver bit did not pop out of the screw head and strip it. From that moment forward, I have never been without one of these amazing machines at my side.

          Over the years, these drivers have been improved to the point of near perfection and this includes the batteries that power them. Battery size has grown from 9.6 volts to 18 volts and more. More than that, battery life has been greatly extended from what it was with the advent of Lithium Ion technology and subsequent improvements on that. In fact, a significant part of the cost of any impact driver, whether it comes from Makita Tools, Bosch or DeWalt is the battery or batteries that come with it.

          You may have noticed that most manufacturers of cordless woodworking tools have started selling so-called “bare tool bodies” meaning that they come with no battery or charger included and a greatly reduced price tag. The reason for this is that most manufacturers (but not all) have discovered that if they make all their tools run on the same 18-volt Lithium Ion battery, they can sell more bare tool bodies while locking in their customers to their brand. End users love this because they do not have to keep laying out hard-earned money for shelves full of different batteries and chargers but, rather can just buy the bare woodworking tools that share the same battery.

          Several manufacturers like Makita Tools have included two or more speed ranges in their impact drivers. Sometimes, too much power is not always a good thing. You can destroy small screw heads and break screw shafts. The more power used, the less battery life. Just because you have a 400 HP motor under the hood of your car does not mean that you drive around town with the accelerator pedal to the floor.

          While a 12 or 14.4 volt impact driver will suffice for most jobs, an 18 volt model is well worth the small increase in price. If you are interested in perhaps purchaing an 18 volt Impact driver, check out our review of four models from Bosch, DeWalt, Makita and Milwaukee at PerfectWoodworking.com/impactdriversreview/


Bob Gillespie
Woodworker

© 2010

For similar articles and tool reviews see:

PerfectWoodworking.com

WHAT TO KNOW ABOUT ROUTERS

          The wood router is essential among woodworking tools because it adds decorative detail that enhances and defines the final appearance of your woodworking project. Used correctly, the wood router is to the woodworker what a fine paintbrush is to an artist. It's all in the details.


          There are four, basic types of wood routers on the market today: laminate trimmers, lightweight or low-powered routers in the 7/8 to 1 1/2 HP range, medium-powered routers in the 1¾ to 2¼ HP range and high-powered routers in the 3-4 HP range. Each has its use and I have owned all of them at the same time. The laminate trimmers do what their name implies as well as other light-weight tasks such as making hinge mortises. They are only suitable for small router bits but they are easily maneuverable and fit nicely right in your palm.

          If you need more horsepower but still like the ease of a lightweight router, the 7/8 to 1/12 HP routers will do a fine job of spinning router bits up to ½” radius round-over bits. Every shop should have one of these handy for bench-top work. They are a bit small for router table use. 2¼ HP woodworking routers have sufficient power to spin large router bits through hardwood and yet they are still light enough to be manageable as bench-top wood routers. While any wood router over 2 HP can be used in a router table, I prefer the high powered ones for that application because there is no need to worry about how heavy they are and you might as well have as much power handy as you might need. Most, but not all, of these larger routers are plunge routers. The high horsepower is necessary to plunge large bits deep into hardwood to make mortises and the like.
           If I could only afford one wood router, it would be the 2¼ HP variety because it is light enough for most bench-top work and can also be used in a router table. If I could afford two routers, I would probably have a 7/8 to 1½ HP wood router for bench-top work and a 3½ HP wood router under my router table. I don’t like mounting and dismounting routers under my router table, so having a lighter wood router on hand near the bench at all times really speeds things up.

          I’d like to make a few observations about routers. First, I suggest you consider using only high-quality carbide-tipped router bits in these woodworking tools whenever possible. They can be re-sharpened many times and they usually don’t burn up and load up if they are kept sharp. High-speed steel bits don’t last long, they are not worth sharpening and they dull quickly, burning your workpiece as they soon load up and turn black from burning. Sometimes, however, the bit profile you need may only be available in a high speed steel bit but this is the exception rather than the rule.


          Second, as hand-held power woodworking tools, heavy and/or top-heavy routers are hard to manage. Not only will you be struggling with them all day, they tend to tip easily which can often ruin a cut or leave an incomplete cut. If a smaller, low-profile wood router could have spun that bit, then that is the wood router you should have been using. On the other hand, an under-powered wood router will not do a good job and may not even be safe. Also, be sure to check the weight of any wood router you may be considering, if it is to be hand-held. Heavy woodworking tools are tiring and clumsy to use all day long. A pound or two less can make a big difference.
           Third, consider how you will be hanging onto the wood router while it is cutting. Are the handles comfortable enough for continuous use? Do the shape and material of the handles allow you to control the wood router properly. Some of these woodworking tools are also available with “D” handles (at extra cost) which may give you better control and feel. One wood router from Milwaukee even offers a padded grip around the exterior of the router base. One hand goes on the rubber grip while the other goes on a conventional knob.

          Fourth, if your wood router is in the 2 1/4 HP range, you will want it to have a variable speed feature, especially if you are planning on using large bits like raised panel bits. You will need to run these large bits a bit slower. They will stay cooler and cut better at a lower speed. On the other hand, you will get smoother cuts with small bits of you keep the speed high. No matter what RPM you choose, you will want your wood router to be able to maintain that speed at all times, no matter how hard you push it. Electronic speed control allows your wood router to compensate for heavy loads by automatically adding a sufficient amount of extra power to keep your wood router spinning at the same speed it was before the cut began.
           Fifth, (and this is a safety consideration) try to buy a wood router that has “soft” start-up. This would not be a needed feature in stationary woodworking tools but is an important safety device in a hand-held wood router. Historically, routers have had only one speed (high) and when you turn them on, they spin up quickly and the gyroscopic force of that can flip a spinning wood router right out of your hands. A soft start-up wood router gradually increases its speed from zero to full, thus eliminating almost all of the gyroscopic effect.
 

          Sixth, if you are going to be changing bits all the time, consider what steps you will have to go through to accomplish that task. Some routers have a shaft lock button so you only need one hand to hold down the button and one wrench to turn the collet nut. I’m kind of used to the two-wrench variety. I usually take the router motor completely out of its base, lay it on its side on the table, putting one wrench on the flat part of the shaft and the other wrench on the collet nut. If I am loosening the collet nut, I will first lower the shaft wrench to the table top and then push down towards the bench with the wrench that’s on the collet nut. If I am tightening the collet nut, I will put the collet nut wrench down to the table top and then push down against that with the shaft wrench on the flat part of the shaft.

          If you’ve used routers at all, you must have noticed that when you are loosening a collet nut, you will feel resistance at the start of the turn of the wrench and then it will turn freely for a while before resisting the wrench one more time. The first resistance comes from loosening the nut itself. The nut then unscrews a bit down the thread and then it begins to push against the collet, releasing it from the shaft of the router bit. When you are tightening a bit into a wood router, you will feel resistance only once as you squeeze the collet around the shaft of the bit while turning the nut as far as it will go.

          Some people like to change router bits with the wood router upside down on the table with the two wrenches sticking out to the side. In this case, the technique is to arrange the wrenches so that you can squeeze their handles together with one hand to loosen, or tighten, the collet nut. For these people, some manufacturers make routers with flat tops. If find this way to be a bit more clumsy than laying the wood router down on the bench and there is less leverage in case of a stuck bit.


          Seventh, router bits come in three shank sizes, ¼”, 3/8” and ½”. The half-inch shank bits are only slightly more expensive than the quarter-inch ones and yet, they give you a distinct advantage. With a larger diameter shank and a larger diameter collet, there is much less chance of slippage under heavy loads. Consider buying only ½” shank bits, especially if you are spinning large cutters.
           Eighth, some of these routers offer “above router table” height adjustment capability. This is usually accomplished by sticking a hex T-wrench into a hole provided. It’s hard to adjust the height of a wood router accurately from underneath a router table while on your knees, fighting gravity. An even more elegant solution is to purchase a router lift for your router table. If this interests you, check out my article at PerfectWoodworking.com/routertablearticle/ entitled “How to Build Your Own Router Table.”
           Ninth, there are three types of wood router bases: conventional, spiral and plunge. In a conventional fixed base, the router motor just slides straight up and down in the base and is clamped into position. The spiral-type base has an adjustment ring that turns in a spiral groove cut into the outside of the router motor casing, thus raising or lowering the router motor relative to the base. A plunge router base clamps onto the router motor and then pushes the wood router and router bit down unto the work piece from above. Some routers are offered in kits containing two or more types of bases so that you only need to buy one router motor for a variety of uses.
 

          Tenth, some of these woodworking tools gauge and control their fine depth-of-cut with a spiral ring while others utilize a geared shaft attached to a calibration knob. All routers have a means of making gross height adjustments by releasing the lever or cam that locks the router motor into the base. Once adjusted to a position close to the final position, the fine depth-of-cut adjustments can be made in increments as small as 1/64 of an inch and, in the case of one router reviewed here, 1/128 of an inch.

          Eleventh, consider that motor amperage is usually a better indicator of motor power in woodworking tools than stated horsepower. All 2 1/4 HP routers claim to develop 2 ¼ HP but their amperage (electrical power used) varies from 11 to 13 amps.
           Twelfth, and finally, there are some less important (to me) but nice features available on some, but not all, of these woodworking tools including: the availability of a 3/8” collet, an automatic motor power lock-off during bit-changing, a carrying case, a clear plastic sub-base for better viewing, a detachable cord set, a dust proof switch, a switch that can be located left or right for the comfort and convenience of the operator, oval, rubber-molded handles, self-releasing collets and a way to fine adjust the sub-base so that it is exactly centered around the bit shaft.

          The ability to center the sub-base means nothing if you are only using ball bearing router buts but if you are using router guides mounted around the bit shaft, it is vitally important that the bit shaft be centered within the guide. If your bit is not perfectly centered when using template guides, your cut will move from side to side as you turn the router around while cutting. Since the guide is mounted to the sub-base, the hole on the center of the sub-base must be concentric with the router bit shaft.

          If you think, after reading this post that a 2 1/4 H.P. router might be the right size for you and your shop, be sure to check out the review of five different routers of that size from Bosch, DeWalt, Makita, Milwaukee and Porter-Cable at PerfectWoodworking.com/routerreviews/.


Bob Gillespie
Woodworker
© 2010

For similar articles and tool reviews see:
PerfectWoodworking.com